Apple Push Notifications Interview Questions and Answers
Apple Push Notifications Interview Questions and Answers
Apple Push Notification service
In this article, I am going to cover about push notifications like:
- What is push payload size in iOS 11 ?
- What APNs provides?
- What is push notification?How it works?
Push Payload Size
When using the HTTP/2 based APNS provider API, the maximum size for your JSON dictionary is 4KB. For legacy APIs, the payload size is smaller.
- For regular remote notifications, the maximum size is 4KB (4096 bytes)
- For Voice over Internet Protocol (VoIP) notifications, the maximum size is 5KB (5120 bytes)
NOTE
If you are using the legacy APNs binary interface to send notifications instead of an HTTP/2 request, the maximum payload size is 2KB (2048 bytes)
APNs refuses notifications whose payload exceeds the maximum allowed size.
What APNs Provides
APNs makes every effort to deliver your notifications, and to deliver them with the best user experience:
- APNs manages an accredited, encrypted, and persistent IP connection to the user’s device.
- APNs can store and forward notifications for a device that is currently offline.
- APNs coalesces notifications with the same identifier.
What is push notification?How it works?
Assuming your app is push enabled and certificate has been shared to provider.
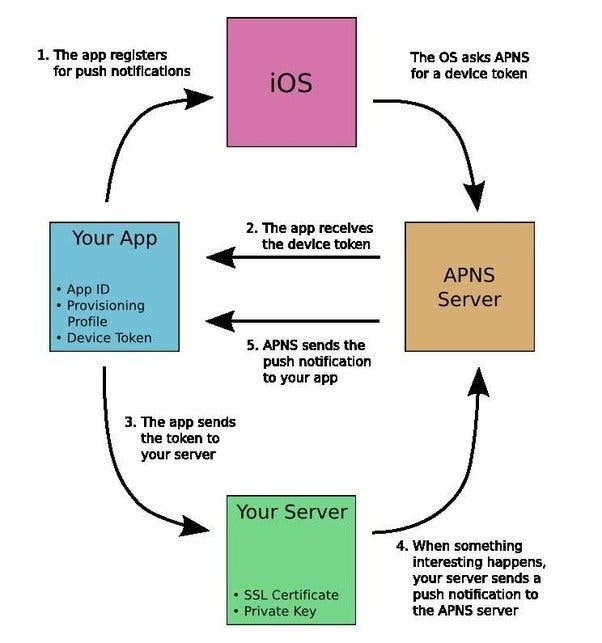
1. Registering Your App with APNs
Communicate with APNs and receive a unique device token that identifies your app.
You register your app and receive your device token each time your app launches using Apple-provided APIs. The registration process is similar across platforms:
-
In iOS and tvOS, call the
registerForRemoteNotifications()method ofUIApplicationto request the device token. Upon successful registration, you receive the token in your app delegate’sapplication(_:didRegisterForRemoteNotificationsWithDeviceToken:)method. -
In macOS, call the
registerForRemoteNotifications(matching:)method ofNSApplicationto request the device token. Upon successful registration, you receive the token in your app delegate’sapplication(_:didRegisterForRemoteNotificationsWithDeviceToken:)method.
2. Forward Tokens to Your Provider Server
Upon receiving a device token, open a network connection from your app to your provider server. Securely forward the device token and any other information you need to identify the specific user to your server.
3. Request Authorization at Launch Time
let center = UNUserNotificationCenter.current()
// Request permission to display alerts and play sounds.
center.requestAuthorization(options: [.alert, .sound])
   { (granted, error) in
      // Enable or disable features based on authorization.
   }
4. Configure Notification Support Based on Authorized Interactions
let notificationCenter = UNUserNotificationCenter.current()

notificationCenter.getNotificationSettings { (settings) in
   // Do not schedule notifications if not authorized.
   guard settings.authorizationStatus == .authorized else {return}
if settings.alertSetting == .enabled {
// Schedule an notification.
}
else {
// Schedule a notification with a badge and sound.
}
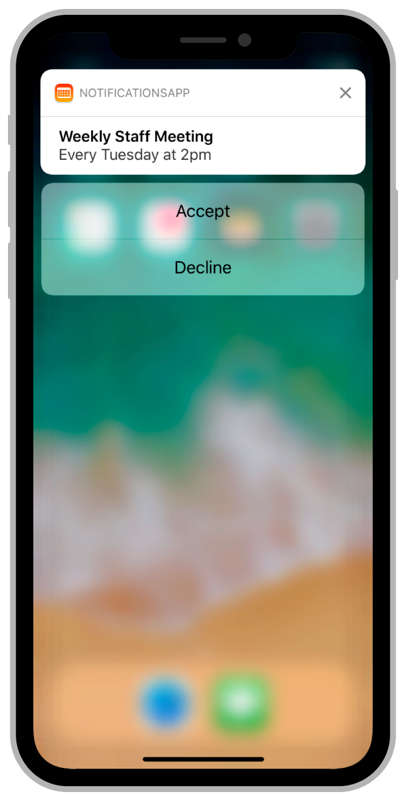
}5. Declaring Your Actionable Notification Types
Differentiate your notifications and add action buttons to the notification interface.

//HANDLE ACTION EVENT
func userNotificationCenter(_ center: UNUserNotificationCenter,
       didReceive response: UNNotificationResponse,
       withCompletionHandler completionHandler:
         @escaping () -> Void) {
}
6. Modifying Content in Newly Delivered Notifications
Modify the payload of a remote notification before it’s displayed on the user’s iOS device.
Notification service app extensions only operate on remote notifications that are configured to display an alert to the user. If alerts are disabled for your app, or if the payload specifies only the playing of a sound or the badging of an icon, the extension is not employed.
Hope you like this article , Please ❤️ to recommend this post to others 😊. Let me know your feedback. :)