VoIP Push Notifications using iOS Pushkit
VoIP Push Notifications using iOS Pushkit
In this blog , i am going to cover about pushkit framework and its uses in VoIP app. let’s start with a scenario..
Scenario: I’m writing VoIP application , i want to update my application in background state or i want to wake my application when any VoIP call receives.
Solution: PushKit is meant to solve these problems by offering a high-priorty push notification with a large payload. The VoIP app receives the notification in the background, sets up the connection.
PushKit vs UserNotifications
When we have user notifications framework, why do we need pushkit is clear now lets check what’s the difference between them.
Unlike user notifications, which are supported by the UserNotifications framework, PushKit notifications are never presented to the user — they don’t present badges, alerts, or sounds. So why do we need push kit, its very obvious question as a developer.
Use VoIP Push Notifications to Avoid Persistent Connections
Prior to iOS 8, developers needed to cater to the following scenarios:
- ActiveConnection in the foreground
- Active background connection (VoIP socket) via VoIP entitlement
- Regular push notifications
This technique resulted in frequent device wakes that wasted energy. It also meant that if a user quit the VoIP app, calls from the server could no longer be received.
Instead of persistent connections, developers should use the PushKit framework — APIs that allows an app to receive pushes (notifications when data is available) from a remote server. Whenever a push is received, the app is called to action. For example, a VoIP app could display an alert when a call is received, and provide an option to accept or reject the call. It could even begin taking precursory steps to initiate the call, in the event the user decides to accept.
There are many advantages to using PushKit to receive VoIP pushes:
- The device is woken only when VoIP pushes occur, saving energy.
- Unlike standard push notifications, which the user must respond to before your app can perform an action, VoIP pushes go straight to your app for processing.
- VoIP pushes are considered high-priority notifications and are delivered without delay.
- VoIP pushes can include more data than what is provided with standard push notifications.
- Your app is automatically relaunched if it’s not running when a VoIP push is received.
- Your app is given runtime to process a push, even if your app is operating in the background.
Using PushKit Framework in VoIP apps
With iOS 8, Apple introduced a new kind of push: VoIP push. There are a couple of benefits of this push message:
- You don’t need to allow push; it works without the user knowing about it.
- Apple promises to deliver these push notifications high priority.
The best thing? It allows you to execute code when the push
arrives. My initial tests in a sandbox environment show that
it’s pretty darn quick, and since you can handle all calls the
same way, it reduces the time to implement our Voice API.
The
PushKit framework sends specific types of notifications — such
as VoIP invitations, watchOS complication updates, and file
provider change notifications — directly to your app for
processing.
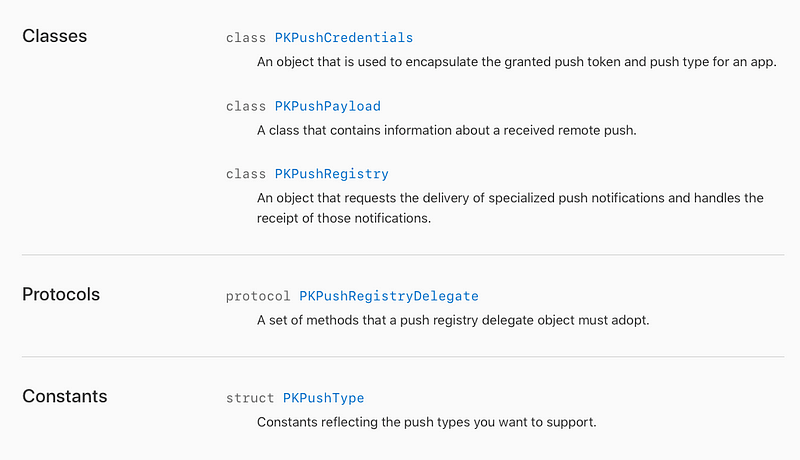
Let’s have a glimpse on classes, protocol provided by PushKit framework.

Prepare to Receive VoIP Push Notifications
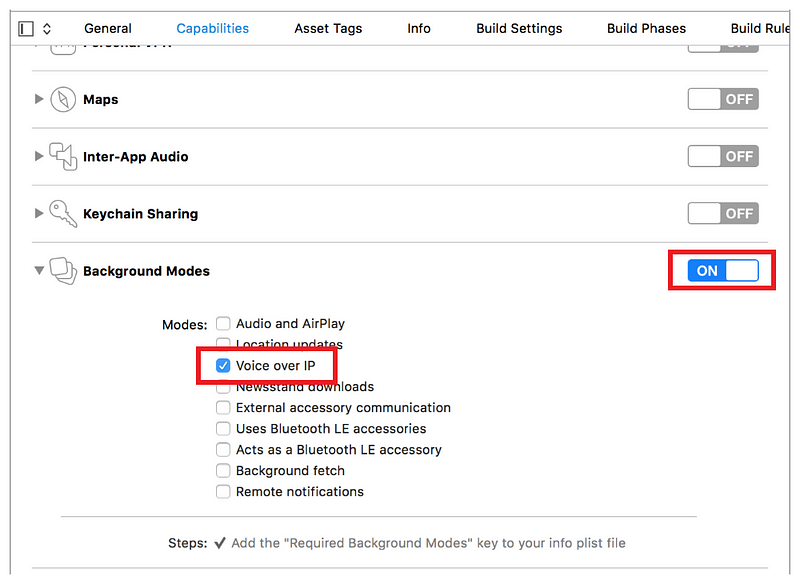
Like all apps that support background operation, your VoIP app must have background mode enabled in the Xcode Project > Capabilities pane. Select the checkbox for Voice over IP.

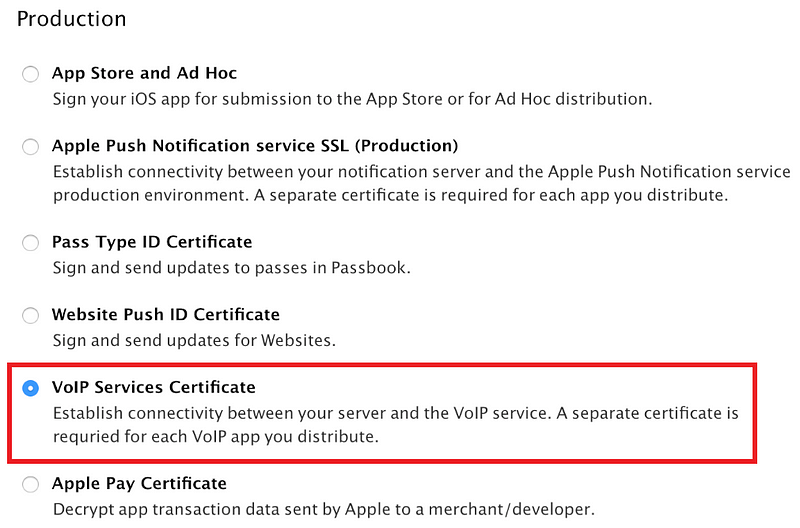
You must also create a certificate for your VoIP app. Each VoIP app requires its own individual VoIP Services certificate, mapped to a unique App ID. This certificate allows your notification server to connect to the VoIP service. Visit the Apple Developer Member Center and create a new VoIP Services Certificate. See Figure below. Download the certificate and import it into the Keychain Access app.

Configure VoIP Push Notifications
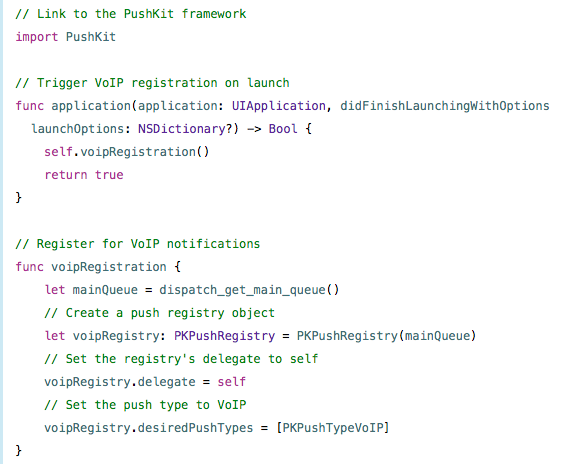
To configure your app to receive VoIP push notifications, link
to the PushKit framework in your app delegate (or some other
location in your app). Then, create a
PKPushRegistry
object, set its delegate to
self, and
register to receive VoIP pushes.

Next, implement a delegate method to handle updated push credentials. If your app receives both standard push notifications and VoIP pushes, then your app will receive two separate push tokens. Both tokens must be passed to the server in order to receive notifications.

Finally, set up a delegate method to process pushes. If your app isn’t running when the push is received, your app will be launched automatically.

Hope you like it, please let me your opinion in comment section.
References: