Resize Image with Swift 4
Resize Image with Swift 4
How do you resize an image in iOS?
Resizing a photo to a new UIImage: Why to read this new blog ?
As lots of blog exists with lots of sample code using UIKit, CoreGraphics and CoreImage frameworks. Most of the iOS developer has seen that code and may be used that code in their project but only some of the developers are able to pick that image quality varies with all these frameworks.
Let’s explore a new way to resize image with better picture quality, Are you ready?
Let’s use Accelerate framework.
vImage
Manipulate large images using the CPU’s vector processor. A wide range of image-processing functions, including Core Graphics and Core Video interoperation, format conversion, and image manipulation.
import Accelerate
extension UIImage{
    func resizeImageUsingVImage(size:CGSize) -> UIImage? {
         let cgImage = self.cgImage!
         var format = vImage_CGImageFormat(bitsPerComponent: 8, bitsPerPixel: 32, colorSpace: nil, bitmapInfo: CGBitmapInfo(rawValue: CGImageAlphaInfo.first.rawValue), version: 0, decode: nil, renderingIntent: CGColorRenderingIntent.defaultIntent)
         var sourceBuffer = vImage_Buffer()
         defer {
              free(sourceBuffer.data)
         }
        var error = vImageBuffer_InitWithCGImage(&sourceBuffer, &format, nil, cgImage, numericCast(kvImageNoFlags))
         guard error == kvImageNoError else { return nil }
       // create a destination buffer
       let scale = self.scale
       let destWidth = Int(size.width)
       let destHeight = Int(size.height)
       let bytesPerPixel = self.cgImage!.bitsPerPixel/8
       let destBytesPerRow = destWidth * bytesPerPixel
       let destData = UnsafeMutablePointer<UInt8>.allocate(capacity: destHeight * destBytesPerRow)
       defer {
             destData.deallocate(capacity: destHeight * destBytesPerRow)
       }
      var destBuffer = vImage_Buffer(data: destData, height: vImagePixelCount(destHeight), width: vImagePixelCount(destWidth), rowBytes: destBytesPerRow)
    // scale the image
     error = vImageScale_ARGB8888(&sourceBuffer, &destBuffer, nil, numericCast(kvImageHighQualityResampling))
guard error == kvImageNoError else { return nil }
     // create a CGImage from vImage_Buffer
     var destCGImage = vImageCreateCGImageFromBuffer(&destBuffer, &format, nil, nil, numericCast(kvImageNoFlags), &error)?.takeRetainedValue()
guard error == kvImageNoError else { return nil }
// create a UIImage
let resizedImage = destCGImage.flatMap { UIImage(cgImage: $0, scale: 0.0, orientation: self.imageOrientation) }
destCGImage = nil
return resizedImage
    }
}
This unpopular or poorly documented little framework packs a
very strong punch. The results are astonishing. This produces
the best results with perfectly crisp and balanced image. Less
blurring compared to CG. Sharper than CG. Not as unnaturally
sharp as CI.
Don’t believe, Please try with your existing
code and make sure you are taking large image and making a
thumbnail..you will surely see the difference!!
Here is a quote from the official apple documentation
The Lanczos resampling method usually produces better-looking results than simpler approaches such as linear interpolation. However, the Lanczos method can produce ringing effects near regions of high frequency signals (such as line art).
You may be using similar kind of code mentioned below in your project which can be directly replaced by this method and check the performance, quality of image.
Core Image:

UIKit
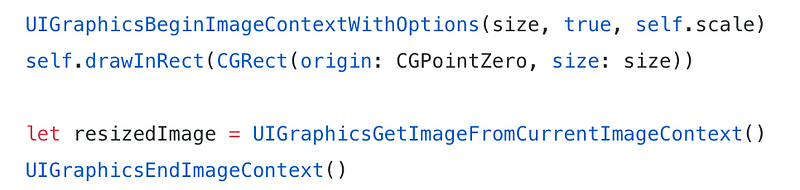
Core Image

Its time to explore a new technique for image resizing.
Hope you like it.